Bottom mount drawer slides have become a staple in modern cabinetry, bringing with them an elegance of design and ease of use. They offer a cleaner look compared to their side-mount counterparts and often provide smoother motion.
Installing these slides might appear daunting at first. However, with the right tools and a systematic approach, anyone can fit their drawers with bottom mount slides that ensure seamless operation and enhanced stability.
Cabinetry, particularly drawers, is all about precision. The success of a drawer slide installation relies heavily on accurate measurements and keen attention to detail, especially with bottom mount designs.
Types of Drawer Slides
Side-Mount vs. Bottom-Mount: A Comparison
Side-mount and bottom-mount drawer slides serve the same purpose but differ in design and application. While side-mount slides attach to the side of a drawer and its cabinet, bottom-mount versions attach beneath the drawer. This difference results in:
- Aesthetics: Bottom-mounts offer a hidden profile, leading to a cleaner drawer appearance.
- Load Capacity: Bottom-mount slides often bear less weight than side-mounts but compensate with a more discreet profile.
Benefits of Using Bottom Mount Slides
Bottom mount drawer slides come with an array of benefits:
- Improved Drawer Appearance: Without visible hardware, the drawer’s design remains uninterrupted.
- Smooth Operation: With precision engineering, these slides provide fluid motion.
- Versatility: Suitable for various cabinet styles and sizes.
Materials and Tools Required
For a seamless and efficient installation process, having the correct tools and materials on hand is paramount. Let’s dive deeper into the intricacies of what you’ll need and why each tool or material is essential.
Comprehensive List of Tools
When setting up for the installation, it’s much more convenient to have all necessary tools gathered beforehand. Here’s an in-depth look:
- Tape Measure: Precision starts with accurate measurements. A quality tape measure ensures you get the dimensions right from the start, eliminating the chances of costly mistakes.
- Pencil or Marker: To mark placement points for the slides. Opt for a marking tool that is easily visible on your cabinet and drawer material but can be erased or wiped away cleanly.
- Screwdriver: For manually fastening the screws. While a regular screwdriver does the job, a ratcheting one can speed up the process.
- Drill and Bits: Used for creating pilot holes to ensure that screws are driven straight and to reduce the risk of splitting the wood. Make sure you have a set of bits appropriate for the screws provided with your slides.
- Level: Essential to confirm that the slides are horizontally aligned. A misaligned slide can lead to operational problems down the road.
- Carpenter’s Square: Helps in ensuring that both the drawer and the cabinet are perfectly square, which is vital for the smooth operation of the slides.
Selecting the Right Slide for Your Drawer
Picking the right slide isn’t just about size. Several factors can influence the type and style of drawer slide that’s best for your particular project:
- Drawer Width: It’s crucial to select a slide that fits the drawer’s width. A mismatch can result in improper functioning.
- Load Requirements: Consider the weight of items you plan to store in the drawer. Heavy pots and pans, for instance, require more robust slides than a drawer for cutlery.
- Mounting Preference: While bottom mount is the focus, they come in full extension, 3/4 extension, and over-travel designs. Each offers different levels of accessibility to the drawer’s contents.
- Disconnect Features: Some slides offer a mechanism to easily remove the drawer from the cabinet – handy during cleaning or relocation.
Preparation Steps
Before diving into the installation, preparing the workspace and components ensures a smoother process.
Measuring the Drawer and Cabinet
Accurate measurements are the bedrock of a successful installation:
- Drawer’s Width and Depth: These dimensions will dictate the size and type of slide you require.
- Interior Cabinet Width and Depth: These measurements ensure that the drawer will fit and operate smoothly once installed with the slides.
- Vertical Space: Measure the distance from the base of the cabinet to the lowest point of the countertop or any obstruction. This ensures the drawer can open fully without hindrance.
Clearing the Workspace
Setting up a dedicated workspace can make a world of difference:
- Safety: A clutter-free area minimizes the chances of accidents, such as tripping over tools or materials.
- Efficiency: An organized space means tools are within easy reach, speeding up the process.
- Visual Clarity: With all necessary items laid out, it’s easier to spot if something’s missing or out of place.
Ensuring Drawer is Square
It can’t be stressed enough how vital a square drawer is:
- Why It Matters: A non-square drawer will not align correctly with the slides, leading to a sticky or misaligned operation.
- How to Check: Use a carpenter’s square to check the inside corners of the drawer. If the drawer isn’t square, it might require adjustments or shimming during slide installation.
Installation Process
A systematic approach can make the installation process much more manageable and error-free. Here’s a step-by-step breakdown:
Step 1: Marking Placement Points
- Why It’s Essential: Precise marking ensures the slides are positioned accurately, facilitating a smooth drawer operation.
- Tips: Always double-check measurements before marking. Remember, it’s easier to measure twice than to redo the installation.
Step 2: Attaching the Slides to the Drawer
- Aligning the Slide: Make sure the slide is flush with the front edge of the drawer.
- Securing: Use screws to attach the slide, ensuring it’s straight. A misaligned slide can result in an uneven drawer.
- Repeat for the Other Side: Ensure symmetry so that the drawer operates smoothly.
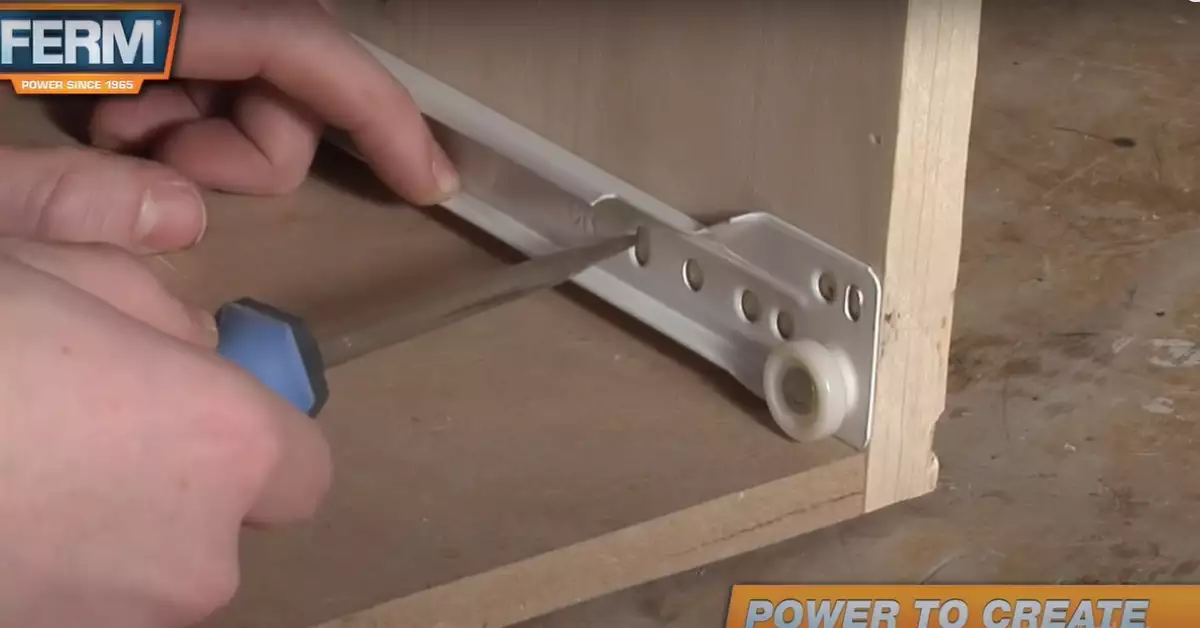
Step 3: Securing the Slides Inside the Cabinet
- Placement: The cabinet portion of the slide should align with your earlier marks. It’s crucial to ensure that both sides are level.
- Fastening: Once aligned, drill pilot holes (to avoid splitting the wood) and then secure using screws.
Step 4: Connecting Drawer to Cabinet
- Sliding in: With the slides attached, you can now slide the drawer into place.
- Checking Operation: Ensure the drawer opens and closes smoothly. If there’s resistance, recheck alignments and make necessary adjustments.
Adjustment and Calibration
Importance of Slide Alignment
Misaligned slides can cause:
- Drawer malfunction.
- Uneven wear and tear.
Tips for Smooth Operation
- Adjust slides as needed.
- Ensure equal slide extension on both sides.
Troubleshooting Common Issues
- Sticking Drawers: Check slide alignment.
- Gap Issues: Adjust drawer front or back as needed.
Care and Maintenance
Cleaning and Dusting Routine
Regularly:
- Wipe slides with a damp cloth.
- Avoid abrasive materials.
Lubrication Tips for Prolonged Use
- Use silicone-based lubricants.
- Apply sparingly and avoid over-lubrication.
Addressing Wear and Tear
- Inspect slides periodically.
- Replace if signs of excessive wear are evident.
Advantages of a Proper Installation
Enhanced Drawer Stability
- Reduces wobbling.
- Ensures longevity.
Extended Lifespan of Drawers
- Even wear distribution.
- Lower replacement costs.
Efficient Storage and Retrieval
- Smooth operation enhances the user experience.
- Reduces the risk of drawer contents shifting.
Frequently Asked Questions
How often should I lubricate the slides?
Generally, once a year or when the drawer motion becomes less smooth.
Can I install bottom mount slides on any drawer?
While versatile, ensure the drawer’s dimensions and design are compatible with the chosen slides.
What should I do if my drawer is misaligned after installation?
Recheck measurements, adjust the slides, and ensure the drawer is square.
Conclusion
Drawer slide installation, specifically of the bottom-mount variety, isn’t merely about following a process. It’s about ensuring a seamless blend of form and function in cabinetry. With attention to detail, the right tools, and a systematic approach, the installation becomes less of a chore and more of an art.
The integration of bottom mount drawer slides adds value to any cabinetry project. Not just in terms of aesthetics but also in terms of functionality, efficiency, and overall user experience.
As with any project, the devil is in the details. Taking the time to measure accurately, select the right materials, and adhere to the installation steps can lead to a drawer that not only looks good but also serves its purpose efficiently for years to come.
Leave a Reply